Note: The information presented here is subject to change as more items, features or retcons are implemented in new patches.
Player versus Player is a feature in Terraria that allows players to attack each other, bringing a wide arrangement of new perspectives on combat.
PvP Guidelines[]
PvP Mode[]
In order for two players to be able to damage each other, both of them must have PvP mode (the crossed swords icon) enabled: a player with PvP disabled won't be able to attack one with PvP enabled and vice versa. Note that damage that a player could deal to oneself (Such as triggering a Boulder or using Explosives) will also apply to any other player, regardless of their PvP status.
The PvP and team selection buttons.
Teams[]
By default, every player will start without a team. A player can choose a team by clicking on one of the five colored shields besides the PvP icon: the sword's color will change to reflect the currently selected team. Note that in order to prevent potential griefing there is a cooldown of about 5 seconds after switching PvP status or teams.
The health, direction and distance of teammates will be shown on the screen. Players belonging to the same team will not be able to damage each other, with few exceptions. Players that don't belong to any team can attack and be attacked by anyone.
Damage Mechanics[]
All base damage dealt to a player with weapons is doubled, meaning that if a hit which usually has a power of 30 hits a player with 10 defense, it will deal (30x2) - (10/2) = 55 damage instead of the usual 25.
This does not apply to "natural" damage, such as fall damage, contact with Lava) or explosives including Hellfire Arrows.
(Note: since update 1.2, damage is no longer doubled against players. This is also applied to self-inflicted explosive damage.)
Cursor Color[]
In PvP, it is almost essential to have dead-on aim, as otherwise, any enemy with a grappling hook and wings will laughably dodge you. If you misfire even a little, then the enemy will likely run through a door frame and your shot will hit the top of the door frame. So, make your cursor color as noticeable as possible in contrast to server colors, such as blue on a red brick dungeon server. This way, you can easily reorient your cursor, as that tends to get lost when you fire in an arc and accidentally spin the cursor so crazily that your eye loses it.
Equipment Builds[]
There are three builds in PvP. They are a melee fighters, ranged fighters, and magic users. These are more commonly referred to as tanks, rangers, and mages, among a variety of other things. This page is a succinct summary of the pros and cons of each build.
Also, do not over-complicate your reforging. If a weapon like the star cannon is adaquately powered up by your armor to kill in 2 shots, don't just spend hours reforging it just so you get 10 more damage points. In PvP, the only time when you should continue reforging is if you can make it so that it takes 1 less shot to kill someone. Do the math beforehand and assume that all enemies have 80 defense and 400 health, the maximum, so that you can find the amount of effort necessary to make a "guaranteed lethal".
(Note, as of 1.2 the max Defense is 115 (144 if the opponent is under 25% health and uses Frozen Turtle Shell) and max health is 500)
Generic Equipment[]
This is gear that can benefit any build, depending on the situation.
- Grappling Hooks are a great aid in climbing steep cliffs, walls, or for getting out of pit traps.
- A Dirt Rod, Sandgun or Ice Rod can create emergency barriers should the need arise. Of them, the Ice Rod has the advantage of creating blocks even in midair, making it effective for stopping most projectiles, though they are only temporary.
- A pickaxe of veritable power such as a Drax is vital in fortification assaults.
- The Obsidian Shield will prevent knockback and make the player immune to Hellstone and Meteorite, should either team employ them as a defensive tactic. The Ankh Shield will prevent a lot of debuffs, too.
- The Cross Necklace becomes much more useful in PvP, as it will greatly reduce the rate at which the wearer takes damage from fast-hitting attack like miniguns and spammed spells.
- A Philosopher's Stone lets players consume healing potions more often, making aggressive blitzkrieg-esque attacks viable.
- Neptune's Shell will increase players' agility in water and allow them to stay indefinitely, making it useful for flooded places.
- Accessories that enhance mobility and speed such as Spectre Boots or Wings are vital to speed and dodging in combat, and Gravitation and Featherfall Potions can also aid in this.
- Lightning Boots can be used for even more speed, while a Jetpack can be used to provide sudden boosts of upwards speed if you hold your UP Key binding while flying.
- Charm of Myths can be used like a Philosopher's stone and give you some regeneration at the same time.
- Rod of Discord can be used for dodging, and getting around enemy bases
- Star Veil combines the effect of both the Star Cloak and Cross Necklace so you can have longer invincibility frames, and have stars fall on your opponents when attaked.
- Lava Waders for water walking and 7 seconds lava immunity.
Generic Buffs[]
- Regeneration Potions will let anyone back away and regain life quickly after sustaining serious damage.
- Ironskin Potion is always useful for reducing damage taken from all sources.
- The Bowl of Soup slightly increases all attributes. A well fed warrior is a happy warrior!
- Water Walking Potion will make it easier to cross lava and water moats.
- Obsidian Skin Potion grants immunity to lava, making lava traps safe to cross.
- Shine Potion and Night Owl Potion make it easier to see in dark areas, increasing visibility for aiming and dodging.
- Use the Gravitation Potion to stay ahead...I mean above, below, left, and right of your opponent with ease! Use this and some wings to arc out of that Star Cannon's path!
Melee[]
A melee character's strategy is to close in quickly on the enemy to dispatch them with powerful melee attacks. The Hallowed Mask gives them a speed and damage boost that helps them to that purpose, while also providing them with a large defence boost against the large amount of projectiles the enemy will send at them while they charge.
As of 1.2, you may want to get Chlorophyte Armor instead of Hallowed.
An alternative to that would be Turtle Armor, if you are looking to tank shots.
As of 1.3 Solar Flare Armor would be the best choice.
As of 1.4.1, you might want to get the Zenith as your primary weapon.
Melee Weapons
- Light Disc: Concescutive discs up to 5 are thrown, allowing for a fast rate of damage, even though it can be dodged rather easily past a certain range and cannot be reforged.
- Dao of Pow: Despite being slow and requiring technical flail proficiency, the Dao of Pow can easily strike multiple enemies while also confusing them, making them an easy target for a finishing blow.
- Gungnir: This spear has a long and wide hitbox, and although it is more accurate at medium range it will strike twice per swing if the target is close enough, but it cannot pass through walls or bypass cover easily.
- Ivy Whip: Although not a weapon, this allows you to zoom across far distances to close the distance between you and those nasty guns.
- Excalibur: The ultimate sword, it swings at a moderate speed and deals considerable damage, further boosted by a very balanced reach. It is best used to deal death blows to weakened, disoriented, or confused enemies. When combined with the Ivy Whip, it is lethal unless reacted to in time.
- Drax: Even though it is a tool, the Drax can be quite deadly because of the ridiculously fast streak of hits it can score, but its digging speed will decimate an arena or be used in sabotage.
1.2 Items
- Death Sickle: This weapon fires a sickle out, and swings constantly- This can allow you to hit multiple times if you do it accurately. It also pierces walls and has fairly long reach.
- Terra Blade: The best possible weapon. It swings and fires a ranged beam, the both of which can be combined to finish off an enemy in 2-4 hits if you get in really close. Plus, you can keep attacking to pick off people low on health if you really wish to (A 1.3 replacement could be Meowmere or Influx Waver).
- Vampire Knives: Good for regen if there are mobs around. It can also shoot through 1 block-walls. It does not do very significant damage.
- Paladin's Hammer: Deals good damage, attacks pretty fast, is easy to aim, and has good reach.
- The Horseman's Blade would be a very good weapon of choice when dealing with many enemies, and paired with the cobalt/obsidian/ankh shield, with good armor, such as Chlorophyte armor, can clear a large group of enemies in seconds by standing in the middle of them and swinging your sword (The Star Wrath could be the 1.3 alternative although the Horseman's Blade is still very powerful).
- Possessed Hatchet works very well in PVP as it homes in on players with the same damage as Paladin's Hammer but less knockback.
Melee Accessories[]
- Anklet of the Wind: It improves acceleration, greatly enhancing mobility.
- Feral Claws: A handy bonus to melee speed which is great if combined with fast-hitting weapon like Excalibur or the Drax, and they will also increase projectile speed and range of the Light Disc.
- Titan Glove: Useful to stunlock enemies easily, though it becomes far less efficient if the enemies have a knockback-negating accessory such as the Cobalt Shield.
- Warrior Emblem: The melee damage bonus pretty much speaks for itself.
- Moon Charm: It is only effective at night, but the good all-round melee ability bonus it provides makes it advisable to always carry around to equip it just in case.
- Star Cloak: As melee fighters are likely to take lots of hits, wearing this will let them counter-attack with a rain of falling stars.
1.2 Items
- Star Veil: Star Veil can combine the effect of a Cross necklace and a Star Cloak, helping you save accessory slots.
- Moon Shell: Combines effects of Moon Charm and Neptune's shell, making you more mobile in water.
- Paladin's Shield: If you're looking to be a tank, this item will definetly work. You get a nice 6- 10, if you reforge it to Warding- and you take 25% of damage that would be intended for an ally. Just be careful- This may leave you with very low health all the time if there are too many people.
- Power Glove: combines the effects of the feral claws and titan gloves into one, making room for another accessory.
Melee Buffs[]
- Ale: It sacrifices some defense to deal more damage: Since there are such high-damage dealing shots, a little bit of armor gone isn't too bad, it is great for giving more punch to attacks.
- Swiftness Potion: As a short ranged weapons user it is important to be able to close in on your enemy quickly, swiftness gives a small boost to speed so you can rush in faster and start dealing damage to the enemy.
1.2 Buffs
- Flasks: These can make your attacks give status effects- Venom, Cursed Flames, Poison, Ichor, or Fire would be very helpful.
Ranged[]
A player that chooses to use ranged weapons will be able to adapt more readily than other classes to changing scenarios, as they can not only choose from guns and bows, but also use a wide variety of ammo to provide different effects. Their headgear is the Hallowed Helmet, which makes their stacks of ammo last longer and increases critical chance and damage, although some might choose the Hallowed Mask for added defense instead.
Chlorophyte Armor is probably better.
Shroomite Armor with Sniper Rifle works very well for ambushes.
Ranged Weapons & Ammunitions[]
- Ammo: The Holy Arrows will add more hits to the volley by summoning falling stars and disorienting an enemy's sense of sound Cursed Arrows deal large damage to a single target while also dealing damage over time, while Hellfire Arrows will strike multiple targets and also cause large audio disorientation, but also hit teammates. The main disadvantage is that most arrows will be picked up by enemies. Cursed Bullets will greatly increase its offensive power by inflicting the Cursed Inferno debuff, while Crystal Bullets will cover a large area around the target with crystal shrapnel, dealing a constant barrage of damage. Stars are rare and gain velocity and therefore spread over time; an opponent halfway across the screen should be able to dodge most projectiles and arc out of the path. Gel has no "special effects".
- Hallowed Repeater:It combines a good rate of fire, satisfactory attack power and decent accuracy with the unique effects of arrows, as a great weapon for covering teammates as well as defusing dangerous enemy encounters. Its arcing shots are marvelous for shooting over obstacles.
- Megashark: Its high rate of fire, low ammo consumption rate and moderate damage make it a devastating crowd-control weapon. However, max defense will easily take it down to only 6 damage per bullet. Most of the time, its reputation can precede it, and use of it generally makes the enemy defensive.
- Clockwork Assault Rifle: The Clockwork Assault Rifle can deal, assuming the target has no defense, the prefix is Demonic, and we use Crystal Bullets with no criticals but all the bullets hit, it can deal 268 damage in one 3-bullet shot in PvP. Unfortunately, a point of defense lowers this burst damage by 6 points. The space between bursts is large, but the projectile velocity is large and it really puts pressure on the enemy. Multiple clockwork assault rifle wielding rangers are almost impossible to overwhelm.
- Shotgun: It fires four shots, consuming only one bullet, making this the most ammo-friendly weapon in Terraria. It is also lethal, as it can do a minimum of 132 damage in close quarters with no prefix and crystal bullets that all hit. Adding Hallowed armor and an Unreal prefix makes a single accurate burst lethal against even maximum defense.
- Star Cannon: It is fast, hard to dodge and has high damage against any kind of target because 2-3 shots are enough to kill the toughest opponent. Some servers might ban this weapon for fairness. Unfortunately the shots accelarate over time, making it impractical for long distance. It also is unable to reflect off walls at ememies, as it cannot use meteor bullets.
- Flamethrower: The Flamethrower shoots a stream of fire that reaches a little less than half across the screen, but also sets enemies on fire, causing moderate damage over time unless they can find water nearby. This weapon is easily countered by any weapon that has more distance, or water. Though low on the damage scale, an extremely long reaching weapon in comparison to spears with 206 damage a cheap burst will have much use. It is very mobile and hard to escape in confined areas.
1.2 Items
- Venom Bullet: This bullet does high damage, and plus, it inflicts Venom on hit!
- S.D.M.G.: An improved version of the Megashark, it can deal much more damage.
- Sniper Rifle: An insane gun. Works well with Shroomite Armor, as Stealth-ing with it improves Damage of an Unreal Sniper Rifle to 269 with a 59% chance to crit, potentially (untested?) one-shotting a player with 0 Defense.
- Rocket Launcher: If one is unafraid of breaking things, one can use this with Rocket IV's to do nice damage at a pretty good rate large area. If you don't want to break things, Rocket I's aren't too bad. One could also have the arena made out of Hardmode Ore, Dungeon blocks, or, if you want to make things fun, hellstone to make it unbreakable.
Ranged Accessories[]
- Band of Regeneration: Since ranged users can fire at the enemy from a safe distance, one of these can help take a break from the fight, especially if a potion is not enough to fully heal the damage sustained.
- Ranger Emblem: An increase to ranged damage. For taking enemies down faster before they become deadly.
Ranged Buffs[]
- Archery Potion: It increases the arrow's damage output and makes them fly faster, making the repeater a more powerful and accurate weapon.
- Ammo Reservation Potion gives a higher chance not to consume ammo, combined with a Ammo Box and a Gatligator/Megashark/Chain Gun/S.D.M.G. that is a 90% chance not consume ammo!
Magic[]
Magical weapons have the potential to cause large damage on the battlefield, and devastate, but since the Hallowed Headgear provides very little defense compared to the other types of helmet it is always better to stay in the back row and defend the base, or alternatively stay behind a melee unit and support them from a distance.
It may be better to use Chlorophyte Armor.
Spectre Armor will work well enough.
Magic Spells[]
- Rainbow Rod: It has the highest damage -magically- for a single hit in the game, but each single shot has to be manually aimed, unless you just click. Nevertheless it is a reliable weapon to take down enemies without giving up one's cover. It also generally bypasses defenses. Almost impossible to dodge, as the player can be chased by it, it is possible to avoid it with the use of quick grappling. "Spam Usage" of this weapon is frowned upon and may result in kicking. Note that in the event that a teammate is being chased, then killing the aimer will make the projectile harmless, and also note that a player carefully aiming may not see you coming (but experienced players will simply rainbow YOU in the face instead).
- Crystal Storm: A low-mana, high damage, somewhat accurate rapid-fire ricohet spell, this weapon is guaranteed lethal at most times. Very hard to dodge, and the ability it has to reflect and bounce make it ideal for shooting around corners or smoking out those persistant campers who attempt spamming weapons.
- Magical Harp: It fires slower than the Crystal storm, but its projectiles can pierce through multiple targets, bounce off walls, and their speed can be controlled by aiming closer or further the player. It can be dodged by retreating.
- Cursed Flames: The projectiles are shot at a decent rate, pierce through enemies, bounce several times and inflict the Cursed Inferno debuff. They will dissipate quickly in tight places, but will stay around for a while in an open field. In the event that they are bouncing around you in numerous amounts, dodging will be downright impossible, unless you are in a large area.
- Laser Rifle:This weapon is highly accurate, but has a very small hitbox, it can shoot at a decent rate, and is the fastest projectile in the entire game, it can be devastating if the user has a high accuracy. The sniper or blitzkrieg-style charging tank will easily demolish ememies with this.
- Demon Scythe: Even though it deals high damage, many take this pre-hardmode weapon for granted. Its slow initial speed allows Magic users to flee or move away from the line of fire, leaving the oncoming enemy damaged from the accelerating scythes. In a chase, using these as huge and exceedingly dangerous temporary landmines is almost foolproof in deterring an enemy long enough for you to deliver the killing blow.
1.2 Items
- Shadowbeam Staff: Does pretty good damage at a very fast rate. Can also bounce, allowing you to make bank shots.
- Golden Shower: While it does low damage, it can cause armor break to foes, lowering their defense.
- Inferno Fork: While it shoots a slow projectile, it does massive damage, and can quadruple hit enemies, and lingers after the hit.
- Bat Scepter: Extremely mana efficient, it is an extremely high DPS weapon. However, it doesn’t work under water, and the homing effect disappears in PVP.
- Razorpine: An upgraded Bat Scepter, this is the highest DPS mage weapon in Terraria. Although it is affected by gravity, it compensates by firing much faster projectiles than the Bat Scepter, allowing it to dole out colossal amounts of damage.
Magic Accessories[]
- Band of Starpower: While they give +20 mana, they are not much to look at since any accessory with the Arcane property has the same effect.
- Nature's Gift: Reduced mana usage is good for making the player's mana pool last longer.
- Sorcerer Emblem: Additional damage combines well with any spell.
- Mana Flower: The ultimate magic accessory, allows the player to make an endless barrage of magical attack as long as they have Mana Potions in their inventory. This accessory effectively makes increasing maximum mana and reducing mana cost pointless, freeing space for more useful accessories. (Can be used so you don't have to hit the J button constantly.
1.2 Items
- Magic Cuffs : These are useful since whenever you get damaged you can recover mana. Good if you combine with a accessory that increases defense so you can take damage and recover mana but not die as quickly.
Magic Buffs[]
- Clairvoyance: More damage and critical rate, better mana regeneration and less mana cost. A good all-round improvement.
- Magic Power Potion: 20% more damage, makes all spells much more potent.
- Mana Regeneration Potion: Not of much use with the Mana Flower, but can make catching one's breath between fights easier.
Building a base: defenses and traps[]
When playing PvP, some game modes could involve two or more teams fighting each other in bases. In such occasions, especially if the local rules bar the use of mining tools or explosives, it can really pay off to set up an efficient base with a variety of traps and contraptions designed to destroy potential attackers. These are just some ideas and suggestions to make a safe base and repel the opposing team.
Note that as most mining tools for 1.1 can mine nearly any block with minimum delay, the material used for the bases is irrelevant even if the server's rules allow mining. Using Lihzahrd Blocks and forbidding using a Picksaw is a workaround.
Defenses[]
These are defensive layouts that don't require complex mechanisms.
Sand Wall[]
Pros: A large wall of Sand or Silt that is not only tall, but also reaches deep enough underground will slow down wannabe attackers, as they will be forced to climb it or tunnel through it. Players can regrow it from a distance by firing volleys with a Sandgun.
Cons: Takes quite a bit of effort to maintain, if the enemy does try to tunnel.
Pits[]
Pros: Pits for the opposing team to fall in can vary in width and depth. They can be dug in strategic places, like a dark tunnel, to conceal them. They can also be filled with a variety of hazards to finish off the victim after they take the fall damage: Hellstone and Meteorite will burn a player unless they have an Obsidian accessory, a thin layer of Lava on the bottom will burn the victim while still dealing fall damage, Spikes on the walls will make it hard to escape and so on.
Cons: Winged Characters and Gravitation Potions will make this trivial.
Rough Terrain[]
Pros: Making a patch of uneven terrain in the base's surroundings will severely hinder the assailant's capability to run and/or trigger a speed boost from the Hermes Boots, leaving them more open to a counterattack.
Cons: Can easily be flown over.
From 1.2 onwards, differences of height of a single block can be simply walked over: bumps of 3 blocks or more are suggested.
Moats[]
Pros: A large basin filled with water or Lava will force the assailants to attempt to jump over it or make a bridge over it, losing time and possibly falling to their death. Not only that, but it can also be filled with a variety of contraptions to make it even more efficient (See the Contraptions section).
Cons: Gravitation potions and flying will trivialize this.
Dummies[]
Pros: A Mannequin wearing armor that covers the whole body (Such as Silver Armor or Necro Armor) may very well look like an idling player, providing a brief but effective distraction before the enemy finds out.
Cons: don't use valuable or powerful armor, or the enemy might steal it.
Sticky Ground[]
Pros: Honey Blocks will make players stick to them, greatly reducing walking and falling speed. A thin layer of honey will make any tight space (such as underground tunnels) harder to cross.
Cons: can easily be removed with pickaxes/drills.
Spikes[]
Pros: Spikes taken from the Dungeon are, because of their sturdiness and decent damage on contact, a good and cheap defensive method. Covering certain surfaces with them (Battlements, walls, dead ends) will make it harder for flying enemies to climb up the base.
Cons: High defense players will only be hit for small amounts of damage, and may nullify other attacks by players.
Funnel[]
Pros: A small room with a single 1-block wide gap in the bottom, hanging in front of the base's main entrance, makes it easy to lob Grenades and Spike Balls from a safe distance.
Cons: The funnel requires player interaction to be effective against enemies.
Contraptions[]
These are manual or automatic defense mechanisms that require Wire and triggers sold by the Mechanic to build.
Landmine[]
Pros:Simply bury an Explosives block and wire it to a Pressure Plate. It is potent enough to kill any enemy instantly.
Cons: It will be gone after one use and will also destroy a large chunk of its surroundings, unless it is made of indestructible blocks such as dungeon bricks.
As of 1.2 there are Land Mines you can buy from the Demolitionist that can do the exact same thing, but don't destroy blocks, making it a more valuable item
Automated Dart Shooter[]
Build a stack of several Dart Traps and wire them to a 3-Second timer.
Pros: Activating it will unleash a continuous volley of poisonous darts. They are useful to attacking land or flying enemies from a distance before they have a chance to draw near.
Cons: Could be tunneled around.
Lava Shower[]
Build two lava reservoirs, one above the other. Separate them with a corridor, making sure to leave 1-block gaps in the floor below, and set some Active Stone Blocks in the ceiling. Use a set of pumps to transport the lava back into the top reservoir, link the pumps to a timer, and wire the timer and the active stone blocks to a lever or switch.
Pros: Turning the switch or lever on will open the ceiling, blocking the path with a continuous stream of lava.
Cons: Obsidian Skin Potions will neutralize this.
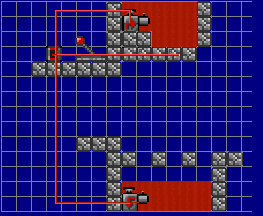
Rolling Boulders[]
To mimic naturally-generated traps, place two active stone blocks next to a wall facing the direction you want the boulders to roll, stack one or more boulders, and either wire them to a manual switch to activate them manually, or to a pressure plate to create a booby-trap.
Pros:This defense can deal massive damage, especially if the boulders' trajectory makes them roll along a flat path or bounce off a slope.
Cons: This trap can be dodged, or blocks could be placed in it.
Drawbridge[]
As simple as it can get: Build a bridge of Active stone blocks over a moat and a wall of Inactive Stone Blocks on the other side; wire them all to a switch and the drawbridge will be able to be raised and lowered on command, making the moat harder to cross and jump over.
Pros: Also, it can be used to drop off anyone still on it to its doom and seal them there.
Cons: Flying or Gravitation will make this trap easily survivable.
Fish Feeder[]
Pros:If you place one or more Piranha Statues in the bottom of a water moat, wire it to a timer so that it can be remotely controlled, and let it spawn hungry fish ready to nip and gnaw at anyone unfortunate enough to fall in. Other monsters can fulfill the role quite decently, like Mimics, whose jumps make them hard to avoid when already hindered by being underwater, and high damage allows them to easily devastate enemies regardless of the armor they’re wearing.Put spikes on the edges to keep them from getting away.
Cons: It is possible, with the right equipment, to escape this trap.
Sniper's Nest[]
Pros:A simple yet effective way to keep ranged and magic defenders out of harm's way is to build small nests with the exterior wall and ceiling made of Active stone blocks wired to a lever: pulling it will close up the nest and repel projectiles and invaders.
Cons: The nest cannot target people if they are at certain angles.
Monster guards[]
A way to pick off enemies quickly is to place monster spawners such as artificial Meteorites and statues, and design the environment so that they fall on the outside..
Pros: This is very effective if the match starts at night due to the fact that the other team doesn't see it, and thus will fall in.
Cons: This could be dangerous because your team can fall in it too.
Advanced Tricks and design[]
Garrisons[]
Building these strategic defensive positions with sturdy blocks and outfitting them with these amenities will greatly enhance the performance of players in it:
- Campfire: It will speed up regeneration of those inside the garrison.
- Honey: A small vat, 2-3 blocks wide and 1 block deep, is enough for anyone inside to splash in and out and gain the regenerative buff.
- Heart Statue, Bomb Statue and Star Statue: They will steadily heal, recharge mana, and provide explosive munitions when wired up appropiately.
Cons: If the enemy manages to capture the position, they will benefit from them instead.
Artillery Units[]
Cannons oriented towards the enemy's side, while tricky to aim, can be very efficient in deterring the enemy or breaking their lines while other fighters take aim with more accurate weapons. Also, they can be fired from behind a wall, making the operator safe from enemy fire, and unless the enemy capturing the fort had adequate munitions for it they will be useless even if they capture the structure, and even if they do, they will still have to dismantle them and move them to the opposite side to use them.
Defense Center[]
A player with a Paladin's Shield equipped can cover their companions from a safe place. Outfitting the room with health amenities (such as a Nurse, active Heart Statues, a Campfire or a vat of Honey) will allow the Defender to keep his/her health topped up, giving the whole team a pretty much indefinite 25% damage reduction.
Cons: This effectively means the team has one player less in the fight.The disadvantage can be recovered partially by either tasking the chosen defender to activate and manage the base's traps and defenses, or letting them fight from a safe distance with weapons like the Sniper Rifle or Rainbow Rod.
Boulder Doors[]
As of 1.2, you can place boulders on top of each other. Placing 2 boulders on top of each other like a 'door' to get in can cause them to be forced to mine into it (Which also activates them instead of breaking then.) (This can be fun if you only use low-tier pickaxes and bases of high-tier ores.)
Pros: This can block your doorway and pick off multiple enemies trying to get in.
Cons: They can get around pretty easily, and this doesn't let you back in easily (Best to have magic mirror+Bed.)